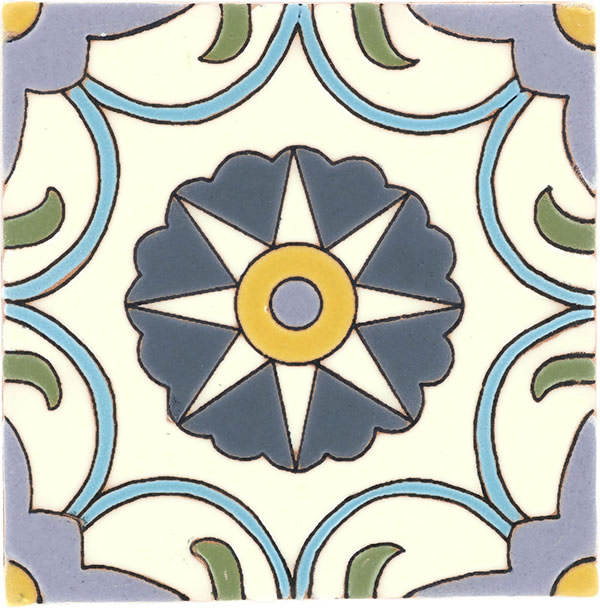
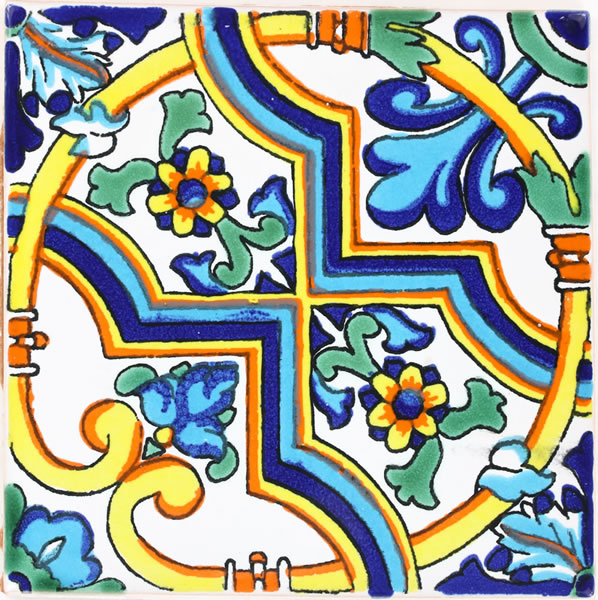
About Mexican Handcrafted Tiles
Our inventory of Mexican tiles is not limited to Talavera tile, we also carry in stock other remarkable tiles. This category showcases one-of-kind beautiful handcrafted Mexican tiles from different regions of Mexico. The tile collections are different from each other because each manufacture utilizes different raw materials and techniques making a unique tile.
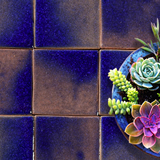
Decorating with Mexican Tiles
Mexican style is about rich colors, texture and tradition. From the golds and oranges of the Sonora desert, to the deep blues of the Pacific, to the turquoise of the Caribbean, and to the greens of the Lacandon jungle of Chiapas, Mexico is rich in natural resources, cultural traditions and craftsmanship. Mexican artisans are inspired from cues of their diverse land and customs, and have much to offer by way of making intricately designed handcrafted tile designs.
To obtain the exotic warm effect of Mexican decor, the white walls must go. Order tile samples in diverse colors like reds, yellows, greens or blues, and at the same time you will have a feel for the texture. After you are okay with the color and texture, choose your tile design or color that is going to be the most prominent. Our tiles and your creativity will help envision unlimited ways to decorate your kitchen, bathroom, or any other area in your home you have in mind, making it an interesting, invigorating and gorgeous space. The following are examples to which Mexican tiles can be put to use and enhance the overall character of the space: stair risers, window and door surrounds, countertops and splashes, shower walls, floor accents, and building panels or facades. The architectural styles can be considered Mexican, Southwestern, Spanish, or Mediterranean.
Installing Wall Ceramic Mexican Tile
1. SURFACE PREPARATION
Mexican tile may be installed over most structurally sound substrates, if they are clean, smooth, dry and free of wax, soap scum and grease. Any damaged, loose or uneven areas must be repaired, patched and leveled. Remove any moldings, trim, appliances, etc., which could interfere with installation. Door jambs may be undercut for tile to slip under.
2. LAYOUT
Begin by marking the center point of all four walls. Snap chalk lines between the center points of opposite walls, which will intersect at the center of room. Make sure they're perfectly square, and adjust if necessary. Next, lay out a row of loose Mexican tiles along the center lines in both directions, leaving spaces for uniform joints (use tile spacers). If this layout leaves cuts smaller than 1/2 tile at walls, adjust the center line by snapping a new line 1/2 tile closer to the wall. Repeat along other center line if necessary. Now divide the room into smaller grids (approx. 2' x 3') by snapping additional lines parallel to center lines
3. APPLYING ADHESIVE
Select the right adhesive for the substrate you're using. Carefully read and follow all instructions and precautions on the adhesive or mortar package. Mix only enough to be used within 30 minutes. Using the type trowel recommended on the adhesive package, spread a 1/4" coat on the surface of one grid area, using the flat side of the trowel. Do not cover guidelines. Next, use the notched side of trowel to comb adhesive into standing ridges by holding trowel at a 45-degree angle. Then remove excess adhesive, leaving a uniform, ridged setting bed. Don't spread a larger area than can be set in 15 minutes.
4. CUTTING MEXICAN TILE
Measure tiles to be cut carefully and mark with a pencil or felt-tip pen. Make straight or diagonal cuts with a wet saw tile cutter, curved cuts with a nipper (chipping away small pieces for best results), full-length curved cuts with a rod saw. Sharp-cut edges may be smoothed with a carborundum stone.
5. SETTING MEXICAN TILE
Variation of shades is an inherent characteristic of Mexican ceramic tile -- mix tiles from several cartons as you set, for a blended effect. Begin installing tiles in the center of the room, one grid at a time. Finish each grid before moving to the next. Start with the first tile in the corner of the grid and work outward. Set Mexican tiles one at a time using a slight twisting motion. Don't slide tiles into place. Insert tile spacers as each tile is set, or leave equal joints between tiles. Fit perimeter tiles in each grid last, leaving 1/4" gap between tile and wall. When grid is completely installed, tap in all tiles with a rubber mallet or hammer and wood block, to ensure a good bond and level plane. Remove excess adhesive from joints with a putty knife, and from tile with a damp sponge. Do not walk on tiles until they are set (usually in 24 hours).
6. GROUTING JOINTS
Generally, you should wait about 24 hours before grouting (refer to the adhesive package for specifics). Carefully read and follow all instructions and precautions on the grout package. Make only enough to use in about 30 minutes. Remove tile spacers and spread grout on the tile surface, forcing down into joints with a rubber grout float or squeegee. Tilt the float at a 45-degree angle. Remove excess grout from surface immediately with the edge of float. Tilt it at a 90-degree angle and scrape it diagonally across tiles. Wait 15-20 minutes for grout to set slightly, then use a damp sponge to clean grout residue from surface and smooth the grout joints. Rinse sponge frequently and change water as needed. Let dry until grout is hard and haze forms on tile surface, then polish with a soft cloth. Rinse again with sponge and clean water if necessary. If needed seal tiles with a penetrating sealer. Wait 72 hours for heavy use.
These guide is provided as a mere helpful resource. Mexicantiles.com is not responsible for any wrong installation, misuse, or damaged caused by the direct or indirect use of the content in this article. MexicanTiles.com strongly suggests consulting a licensed contractor.